
If you have a sweet tooth but still want a healthy boost, the Birthday Cake Protein Balls Recipe is your new best friend. These delightful little bites are packed with protein, have a subtle vanilla sweetness, and that nostalgic pop of rainbow sprinkles to make every bite feel like a celebration. Ready in just 10 minutes, this recipe proves that nutritious snacks don’t have to be boring or bland—they can be as fun and delicious as your favorite birthday cake!
Ingredients You'll Need

The magic of the Birthday Cake Protein Balls Recipe lies in its simple ingredients that combine to create an incredible texture and flavor. Each item is carefully chosen to add protein, creaminess, sweetness, and that cheerful touch of color.
- 1 cup all-natural drippy cashew butter: Provides a creamy, nutty base that holds everything together and adds healthy fats.
- ½ cup vanilla protein powder: Adds the protein punch while enhancing the sweet vanilla flavor.
- ½ cup rolled oats: Gives the balls a chewy texture and heartiness.
- 1 tablespoon honey: A natural sweetener that perfectly balances all the ingredients.
- 2 tablespoons rainbow sprinkles (+ more for rolling): Bring a fun, festive appearance plus a little crunch.
- 1 teaspoon vanilla extract: Boosts the birthday cake flavor with a fragrant vanilla essence.
- Water (as needed): Helps achieve the perfect dough consistency without overpowering the flavors.
How to Make Birthday Cake Protein Balls Recipe
Step 1: Combine Your Ingredients
Start by placing the cashew butter, vanilla protein powder, rolled oats, honey, rainbow sprinkles, and vanilla extract into a medium mixing bowl. This is where the flavors begin to mingle and build that classic birthday cake vibe.
Step 2: Mix Until Dough Forms
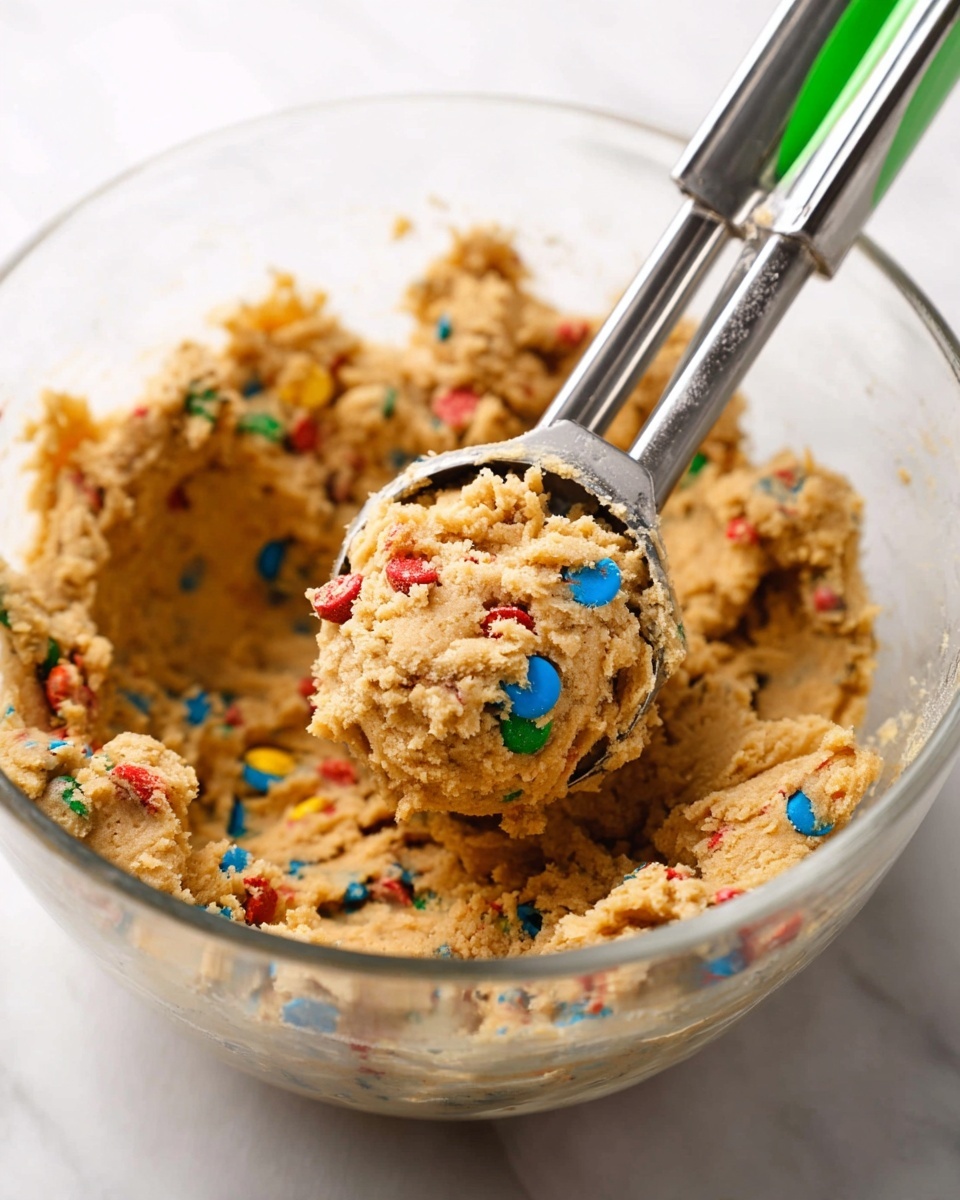
Use a wooden spoon to start mixing everything together. As the mixture starts to come together, you might find it easier to switch to your hands, kneading gently. The dough should feel soft, a little oily, and easily moldable. If it feels too dry, add a teaspoon of water at a time until you get that lovely cookie dough texture.
Step 3: Scoop and Roll
Using a 1 tablespoon cookie scoop, portion out the dough and roll each scoop between your palms to create smooth balls. This is where the fun starts—shaping your energy bites makes you feel even more connected to the snack you're creating.
Step 4: Decorate with Extra Sprinkles
Pour a small pile of extra rainbow sprinkles onto a plate. Roll each protein ball in the sprinkles and then gently roll them again in your palms to make sure the colorful confetti sticks perfectly. This adds that signature birthday cake look and a satisfying little crunch.
Step 5: Serve or Store
These Birthday Cake Protein Balls are delicious right away, but they also keep well. Place them on a plate and munch immediately or store them in the freezer for later. They’ll last up to 3 months frozen and stay tasty and fresh.
How to Serve Birthday Cake Protein Balls Recipe
Garnishes
For an extra festive touch, why not sprinkle a few edible gold stars, colored sugar crystals, or even mini chocolate chips alongside the rainbow sprinkles? Garnishing these protein balls can elevate your snack game and make for a joyful presentation.
Side Dishes
Pair these protein balls with a glass of cold almond milk, a cup of your favorite tea, or a fresh fruit salad to make a balanced snack or a light dessert. The creamy, sweet balls balance beautifully with juicy, tangy fruits like berries or orange slices.
Creative Ways to Present
Serve these balls on mini cupcake liners or stack them on a tiered dessert tray for a party-ready treat. They also make fantastic additions to lunchboxes or grab-and-go snack jars, bringing a pop of color and a burst of flavor wherever you take them.
Make Ahead and Storage
Storing Leftovers
If you have leftovers, no worries! Place your Birthday Cake Protein Balls in an airtight container and store them in the refrigerator. They will stay fresh for up to a week, making it easy to grab one whenever you need a tasty protein boost.
Freezing
For longer storage, these protein balls freeze wonderfully. Arrange them in a single layer on a baking sheet, freeze until firm, then transfer to a freezer-safe container or zip-top bag. They will keep well for up to 3 months and thaw quickly when you’re ready to enjoy.
Reheating
Since these protein balls are best enjoyed chilled or at room temperature, reheating is unnecessary. However, if you like them a bit softer, just let them sit at room temperature for 10 minutes before eating. They soften up beautifully without losing their shape or flavor.
FAQs
Can I use a different nut butter?
Absolutely! Almond butter or peanut butter can be substituted, though the flavor will vary slightly. Cashew butter is mild and creamy, but feel free to experiment based on your preferences.
What if I don’t have vanilla protein powder?
You can use unflavored protein powder and add a little more vanilla extract or try a flavored version like cake batter or white chocolate for an extra twist. The vanilla protein powder helps keep that authentic birthday cake vibe, but alternatives can work well too.
Are these protein balls vegan-friendly?
To make this recipe vegan, swap the honey for maple syrup and ensure your protein powder is plant-based. The rest of the ingredients are naturally vegan.
Can I make these without sprinkles?
Definitely. The sprinkles add the festive birthday look, but you can skip them or use chopped nuts, seeds, or shredded coconut for decoration and texture instead.
How many protein balls does this recipe make?
You’ll get about 15 protein balls from this recipe, making it perfect for sharing or batch prepping for the week ahead.
Final Thoughts
There’s something genuinely joyful about creating and enjoying the Birthday Cake Protein Balls Recipe. They’re quick, easy, and bring that delightful birthday party feeling to your snack time without any guilt. Whether you’re looking for a post-workout treat, a lunchbox surprise, or a quick pick-me-up, these protein balls hit the spot every time. Treat yourself to a little celebration in every bite—you absolutely deserve it!
Print
Birthday Cake Protein Balls Recipe
These Birthday Cake Protein Balls are a quick, no-bake treat combining creamy cashew butter, vanilla protein powder, and festive rainbow sprinkles. They're easy to mix, require no oven, and make a perfect protein-packed snack or dessert for celebrations or everyday indulgence.
- Total Time: 10 minutes
- Yield: 15 servings
Ingredients
Ingredients
- 1 cup all-natural drippy cashew butter
- ½ cup vanilla protein powder
- ½ cup rolled oats
- 1 tablespoon honey
- 2 tablespoons rainbow sprinkles (+ more for rolling)
- 1 teaspoon vanilla extract
- Water, as needed
Instructions
- Combine Ingredients: Place all the ingredients except the additional sprinkles into a medium bowl to prepare your base mixture.
- Mix Dough: Use a wooden utensil to stir until the ingredients start to come together. As the mixture thickens, knead it with your hands to form a malleable, slightly oily dough. Add water a teaspoon at a time if the dough feels too dry, aiming for a consistency similar to cookie dough.
- Form Balls: Use a 1-tablespoon cookie scoop to portion out the dough. Roll each portion between your palms to shape into smooth balls.
- Coat with Sprinkles: Spread additional rainbow sprinkles on a plate. Roll each protein ball in the sprinkles, then gently roll them again between your palms to ensure an even coating.
- Store and Serve: Place the finished balls on a plate and enjoy immediately or store in the freezer. They will keep fresh for up to 3 months frozen.
Notes
- Use drippy cashew butter for best texture; avoid dry or overly thick nut butters.
- If mixture is too dry, add water slowly to prevent it from becoming too sticky.
- Store the protein balls in an airtight container in the freezer for long-term preservation.
- These protein balls are great for meal prep and quick energy boosts.
- For variation, substitute sprinkles with crushed nuts or coconut flakes if preferred.
- Prep Time: 10 minutes
- Cook Time: 0 minutes
- Category: Snack
- Method: No-Cook
- Cuisine: American
- Diet: Vegetarian


Leave a Reply