
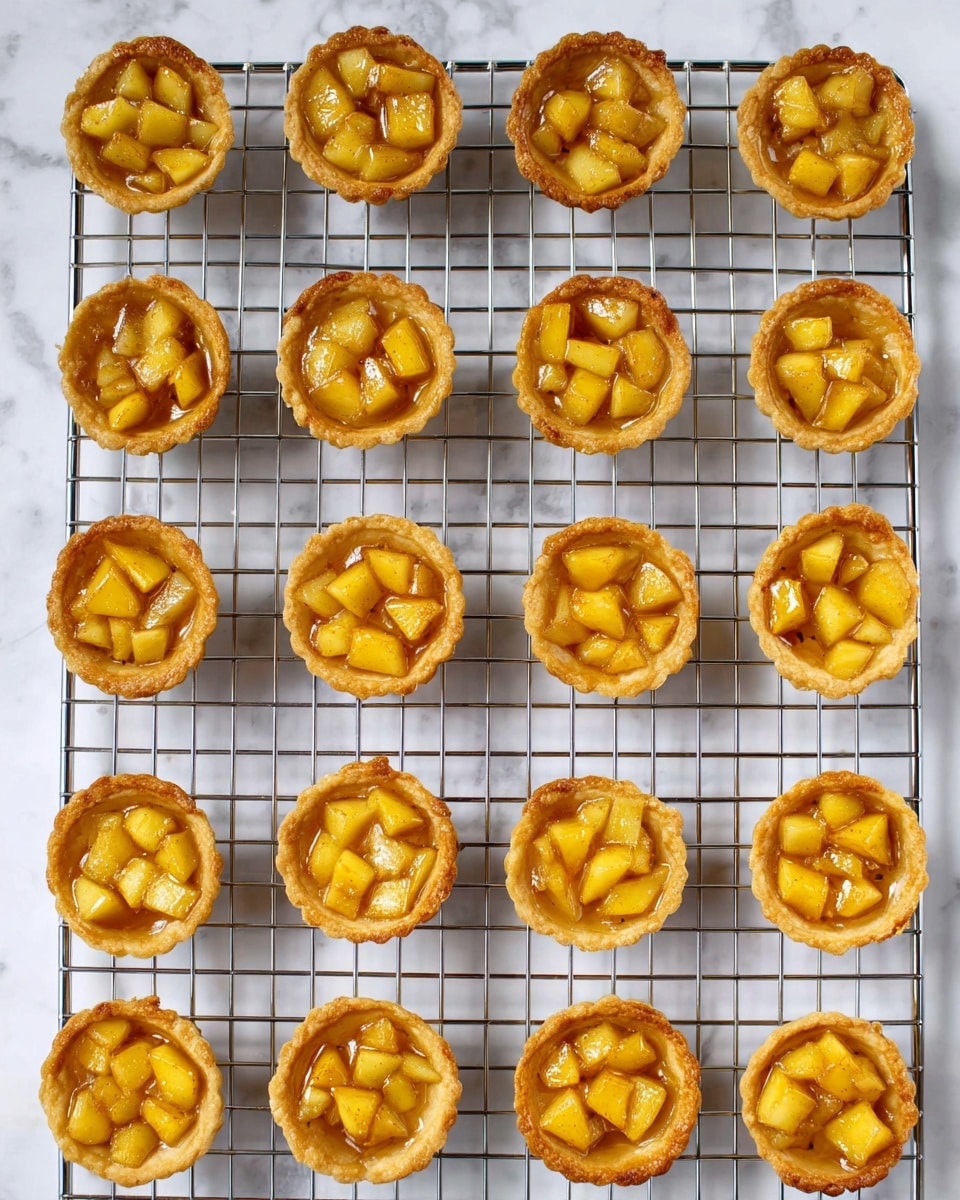
If you have a soft spot for comforting fall flavors wrapped up in a delicate, buttery crust, you are going to adore this Caramel Apple Tartlets Recipe. These little bites pack a delightful punch of crisp Granny Smith apples enveloped in a luscious caramel coating, all nestled in perfectly golden and flaky tartlet shells. They’re simple to make but impressively satisfying, whether you’re serving them at a cozy family gathering or craving a sweet treat that feels homemade and heartfelt. Let me walk you through everything to create these irresistible mini desserts that are as fun to make as they are to eat!
Ingredients You'll Need

The beauty of this Caramel Apple Tartlets Recipe lies in its simplicity, with each ingredient playing a crucial role in bringing out the perfect balance of textures and flavors. From the flaky pie crust to the tangy Granny Smith apples and the rich caramel sauce, these components come together harmoniously to create a little tartlet marvel.
- 1 sheet refrigerated pie crust: Provides a buttery, flaky base that’s easy to work with and bakes up golden.
- 1 tablespoon sugar: Adds just a touch of sweetness to the crust edges for a subtle caramelized flavor.
- 1 teaspoon cinnamon: Infuses the crust with warm spice enhancing the autumn vibe of the tartlets.
- Non-stick spray: Ensures the tartlet shells release easily from the pan without sticking.
- 2 tablespoon unsalted butter: Helps soften the apples and adds richness to the filling.
- 3 medium Granny Smith apples, peeled, cored, and diced: Their tartness perfectly balances the sweet caramel.
- 1 tablespoon lemon juice: Keeps the apples from browning and brightens the flavor.
- 3 tablespoon sugar: Sweetens the apple filling to complement the caramel without overpowering it.
- 3 tablespoon caramel sauce: The star ingredient giving the filling its luscious, gooey quality.
- 2 tablespoon flour: Thickens the apple-caramel mixture to prevent it from being too runny.
- 1 teaspoon cinnamon: Adds warmth and depth to the filling’s flavor profile.
- ½ teaspoon salt: Balances the sweetness and enhances all the flavors.
How to Make Caramel Apple Tartlets Recipe
Step 1: Prepare Your Tartlet Shells
Start by preheating your oven to a cozy 350°F and spraying a mini muffin pan with non-stick spray. This ensures your tartlets come out easily with clean edges. Unroll the pie crust onto a lightly floured surface, cut out 2-inch circles with a cookie cutter, and gently press each circle into the mini muffin cups to form perfect little shells. Prick the bottoms with a fork to prevent puffing and spray again inside each to keep them perfectly crisp. A sprinkle of cinnamon-sugar on the crust edges adds subtle sweetness and texture before you bake them to a light golden glow for about 8 to 10 minutes.
Step 2: Make the Caramel Apple Filling
While your tartlet shells cool, it’s time to create the heavenly filling. Melt the butter in a saucepan over medium heat and add the diced apples with a splash of lemon juice. Cook those apples until they’re tender but still have a little bite — this is key to keeping your tartlets from getting mushy. Stir in the sugar, caramel sauce, flour, cinnamon, and salt, then cook a bit longer to let the sugars dissolve and the sauce thicken into a rich, glossy caramel coating that hugs each apple piece beautifully.
Step 3: Assemble and Bake
Once the filling has cooled just enough to handle, spoon it generously into each tartlet shell. The caramel apple mixture should be warm but not piping hot to avoid sogging the crust. These tartlets can be enjoyed warm right away or after they cool to room temperature, where the flavors meld even deeper and the texture delights with every bite.
How to Serve Caramel Apple Tartlets Recipe
Garnishes
For a finishing touch, sprinkle a tiny pinch of powdered sugar or add a small dollop of whipped cream on each tartlet. A few finely chopped nuts like pecans or walnuts can also elevate these treats with a lovely crunch and nuttiness. If you want to be extra festive, a cinnamon stick on the side serves as a charming garnish for a dinner party.
Side Dishes
Serve these tartlets alongside a scoop of vanilla bean ice cream or a drizzle of heavy cream to complement their warm caramel apple flavors. Paired with a cup of hot apple cider or a fresh cup of coffee, these tartlets shine as a cozy autumnal snack or a beautiful dessert after dinner.
Creative Ways to Present
Think beyond the mini muffin tin presentation. Place your tartlets on a rustic wooden board or a vintage platter to highlight their charming rustic look. You could also pop a tartlet on individual dessert plates with a small drizzle of extra caramel sauce around the edge for a fancy touch that impresses guests without fuss.
Make Ahead and Storage
Storing Leftovers
If you have any leftovers (which might be hard!), store the tartlets in an airtight container in the refrigerator for up to 3 days. Keeping them chilled helps maintain the integrity of the filling and crispness of the shells.
Freezing
These tartlets freeze wonderfully. Place them on a baking sheet to freeze individually before transferring to a sealable bag or container. They’ll keep for up to 1 month and can be reheated gently when ready to enjoy.
Reheating
To reheat, warm the tartlets in a preheated 325°F oven for about 8 to 10 minutes until heated through and the crust is crisp again. Avoid microwaving to prevent sogginess and to keep that delicate crumb delightfully flaky.
FAQs
Can I use a different type of apple for this recipe?
Absolutely! While Granny Smith apples offer a nice tartness and hold their shape well, you can try Honeycrisp or Fuji for a sweeter, slightly softer filling. Just adjust the sugar accordingly.
Is it necessary to use refrigerated pie crust?
Using refrigerated pie crust makes the process much simpler and yields a buttery, flaky base, but if you prefer homemade dough, it’s a fantastic option too!
Can I prepare the filling ahead of time?
Yes! You can make the filling a day ahead and store it in the fridge. Just warm it gently before filling the tartlet shells for best results.
Are these tartlets gluten-free?
The classic recipe uses pie crust with gluten, but you can use gluten-free pie crust dough available in stores or homemade to make them gluten-free.
What’s the best way to prevent soggy tartlet shells?
Pricking the crust with a fork and spraying with non-stick spray before baking helps, plus filling them just before serving keeps the texture perfect.
Final Thoughts
Once you try this Caramel Apple Tartlets Recipe, it’s sure to become a cherished favorite for cozy gatherings and special occasions alike. The combination of crisp, fruity filling and golden, buttery crust is pure magic in every bite. So grab your pie crust and apples, and whip up this easy yet impressive dessert that everyone will be asking for again and again.
Print
Caramel Apple Tartlets Recipe
These Caramel Apple Tartlets are delightful mini desserts featuring a flaky pie crust filled with a rich, tender caramel apple mixture. With a buttery, cinnamon-sprinkled shell and a luscious caramel apple filling, they offer a perfect balance of sweet and tart flavors. Quick to prepare and ideal for gatherings or an elegant treat, these tartlets bring the warmth of baked apples and caramel together in bite-sized perfection.
- Total Time: 25 minutes
- Yield: 24 tartlets
Ingredients
For the Shells
- 1 sheet refrigerated pie crust
- 1 tbsp sugar
- 1 tsp cinnamon
- Non-stick spray
For the Filling
- 2 tbsp unsalted butter
- 3 medium Granny Smith apples, peeled, cored, diced
- 1 tbsp lemon juice
- 3 tbsp sugar
- 3 tbsp caramel sauce
- 2 tbsp flour
- 1 tsp cinnamon
- ½ tsp salt
Instructions
- Preheat and Prepare Pan: Preheat your oven to 350°F (175°C). Lightly coat a mini muffin pan with non-stick cooking spray and set it aside to ensure easy removal of tartlets after baking.
- Cut Dough Circles: Unroll the refrigerated pie crust onto a lightly floured surface. Using a 2-inch round cookie cutter, cut out as many circles as possible. Re-roll the scraps and continue cutting until all dough is used.
- Shape Tartlet Shells: Press each dough circle gently into the prepared mini muffin pan cups, fitting the dough to cover the bottom and sides evenly.
- Prick and Spray Shells: Use a fork to prick the bottom of each crust to prevent bubbling during baking. Lightly spray the inside of each shell with non-stick spray for a crisp finish.
- Add Sugar-Cinnamon Topping: Mix sugar and cinnamon in a small bowl, then sprinkle this mixture evenly over each tartlet shell to add sweetness and spice to the crust.
- Bake Tartlet Shells: Bake in the preheated oven for 8 to 10 minutes or until the edges are lightly golden. Remove from oven and let shells cool slightly. Carefully lift them from the pan once cooled.
- Prepare Filling: In a small saucepan, combine diced apples, lemon juice, and butter. Cook over medium heat for 5 to 10 minutes, stirring occasionally, until apples become tender but retain their shape.
- Thicken Filling: Stir in sugar, caramel sauce, flour, cinnamon, and salt. Continue cooking 3 to 5 minutes while stirring frequently until the mixture thickens and caramel coats the apples evenly.
- Cool Filling: Remove the saucepan from heat and let the filling cool slightly, making it easier to spoon into the tartlet shells.
- Fill and Serve: Spoon a generous amount of the warm caramel apple filling into each cooled tartlet shell. Serve immediately warm or allow tartlets to cool to room temperature before serving.
Notes
- Use Granny Smith apples for a tart flavor that balances well with the caramel sweetness.
- To save time, prepare the filling while the tartlet shells bake.
- These tartlets can be served warm or at room temperature; they are delicious either way.
- For extra indulgence, serve with a scoop of vanilla ice cream or a dollop of whipped cream.
- Store any leftovers in an airtight container in the refrigerator for up to 2 days.
- Prep Time: 15 minutes
- Cook Time: 10 minutes
- Category: Dessert
- Method: Baking
- Cuisine: American


Leave a Reply